|
<Root level>QuickView
|
Send comments on this topic |
 QuickView

The QuickView window is used to instantly inspect your files and test and reference different settings and appearances for images.
The title bar shows the name of the image, the current scale percentage of the image in the window, the size of the view window and the size of the source image as well as color information for the pixel the mouse cursor is currently over.
![]() When in license evaluation period the MysticThumbs logo is overlaid on the image. This is not present when registered.
When in license evaluation period the MysticThumbs logo is overlaid on the image. This is not present when registered.
Control
The window will open as close to 100% the size of the image (or embedded thumbnail, depending on control panel settings for the file type/extension).
You can left click and drag to move the window around just as if you had done the same on the title bar.
Resizing the window from any edge or corner will resize the entire window keeping the aspect ratio of the image. Once you stop resizing the image will be recalculated for the new window size based on the current settings of the image. This includes transparency, scale, sampling etc. as seen in the below options.
Pressing the Left or Up arrow keyboard keys will move to the previous supported image in the folder.
Pressing the Right or Down arrow keyboard keys will move to the next supported image in the folder.
If QuickView was initiated from the Explorer Shell using the Space Bar then selecting another image in the folder will update the QuickView window with that image.
Context Menu
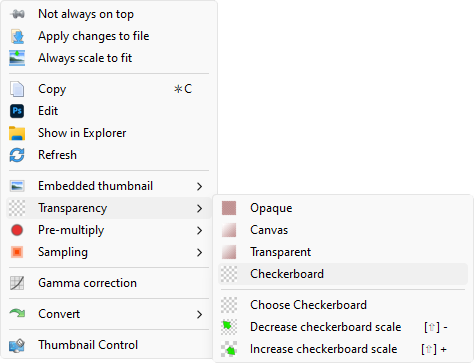
Right clicking in the window opens a context menu suitable for the image being displayed.
![]() The global context menu mode applies here for expanded / collapsed menus preference.
The global context menu mode applies here for expanded / collapsed menus preference.
![]() Relevant options depending on the file format will be displayed.
Relevant options depending on the file format will be displayed.
Program Options
 Always on top
Force QuickView windows to be on top of all other windows.
This can be useful to keep a visual reference whilst working with other applications.
![]() Apply changes to file
Apply changes to file
When enabled, changes made in QuickView are immediately applied to the file on disk as overrides.
![]() File overrides (also available using the Shell Thumbnail context menu) can apply specific changes to individual files over what is set in the control panel for the file type / extension.
File overrides (also available using the Shell Thumbnail context menu) can apply specific changes to individual files over what is set in the control panel for the file type / extension.
File Options
 Copy
Copy
Keyboard shortcut: [Control]+C
Use this to copy the current image as it appears in the view window to the clipboard for use in copying to a paint program, email etc.
For maximum application compatibility the following formats are copied into the clipboard:
oWindows Device Dependant Bitmap (DDB, does not support alpha channel)
oWindows Device Independent Bitmap V5 (DIBV5, with alpha channel)
oPNG with transparency channel
Edit
Opens the file in the associated application for the current image / file extension.
![]() Depending on the associated application for this file extension the icon of that application is shown instead for an improved visual cue.
Depending on the associated application for this file extension the icon of that application is shown instead for an improved visual cue.
 Edit
Edit
Open the file in it's associated application for editing.
![]() The thumbnail will change according to the associated application for the file.
The thumbnail will change according to the associated application for the file.
 Show in Explorer
Open the file a File Explorer window and select it.
 Refresh
Refresh and update the QuickView display depending on external changes.
Regular Options
See File context menu.
 Gamma correction
Adjust the gamma correction using a slider that will pop-up on the bottom of the QuickView window.
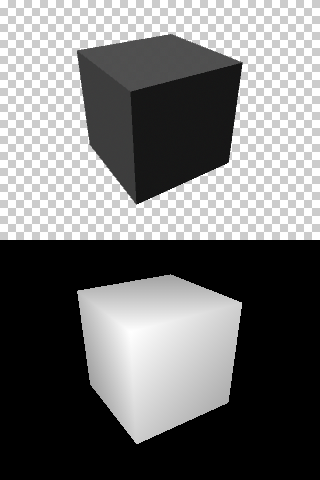
 Depth buffer
The depth buffer option is only available for IFF images that have been saved with an embedded depth buffer.
![]() Enabling will show the depth buffer below the image and resize the window to suit.
Enabling will show the depth buffer below the image and resize the window to suit.
 Register
Opens the control panel registration page to register your license key or inspect the evaluation time remaining.
 Removed if the application is currently registered.
 Control Panel
Opens the control panel and selects the file format and extension for the currently open file.
Adjustments made will not affect the currently viewed image as the viewer uses its own settings for each session unless it has Apply changes to file option enabled.
Copyright © MysticCoder Pty Ltd
